This afternoon I have finished the foreground of the landscape...
...just filling in in front of the wall with muddy water with the tops of a few plants poking up.
Then when I looked at the overall effect I was very irritated by the fact that the clouds were right at the top edge and would be chopped off by the binding. This post a little while ago shows how the raw edge is just a fraction of an inch above the top of the clouds.
The solution was to slice off a little of the unquilted fabric from the bottom and lay it over the wadding at the top and quilt over the raw edges - easy to spot if you look closely, but fairly unobtrusive from the opposite side of the room.
Now I have to think about how I am going to bind it. I already have a few ideas for the next landscape, and this time I might plan it a little better.
Linking up today with Leah Day's blog for her last Free Motion Friday
Welcome to Jennie Whitwood, the latest follower - thank you for joining!
This is where the paper flowers have ended up - decorating the skirt of the outfit that I have made for the Out of Print Fashion Show. It took me eleven days to make the complete ensemble, including accessories, and we had the dress rehearsal last Thursday. It promises to be an interesting night - no two outfits alike, or even remotely similar...
It was quite enjoyable running up something that is to be worn once only and just for the fun of it. No finished seams, loose ends hanging everywhere. I wish I could get away with it all the time!
Linking up today with Connie's blog Freemotion by the River for Linky Tuesday.
A wonderful view of the Dorset coast, seen from the ferry when we were sailing to France a few years ago.
Welcome to Ruth W, the latest follower- thank you for joining!
Here is the bodice with the side seams done. I have done more felled seams.
Also on the sleeves I have done felled seams. I couldn't have managed doing it on sleeves that are any longer because you have to work down a tube, and it was a bit of a tight operation, but I managed it. Usually I do French seams, but they give a bit more bulk and it can be a fuss trimming the extra bulk where the seams join under the arms - so this time I thought I would have the fiddly bit over and done with at this stage to make life easier later on.
Inserting the sleeve always looks as though it will be daunting. The sleeve head seems pretty enormous compared to the armhole in which it is to be inserted. But it will work...
Welcome to the latest follower, Stampcrazy1962 - thank you for joining!
This lovely cotton batik was sitting in a charity shop waiting for me to buy it. It is a couple of yards long, mostly printed with the design shown in the first picture...
... with two bands incorporating this narrow border...
... with this wider border set between them.
It is a sarong print. Swanning around on hot beaches looking exotic really isn't my style, so there is no room in my wardrobe for a sarong. Perhaps a dress, or a top and a skirt that I can wear separately. Either way, making the best use of the border design might take some working out.
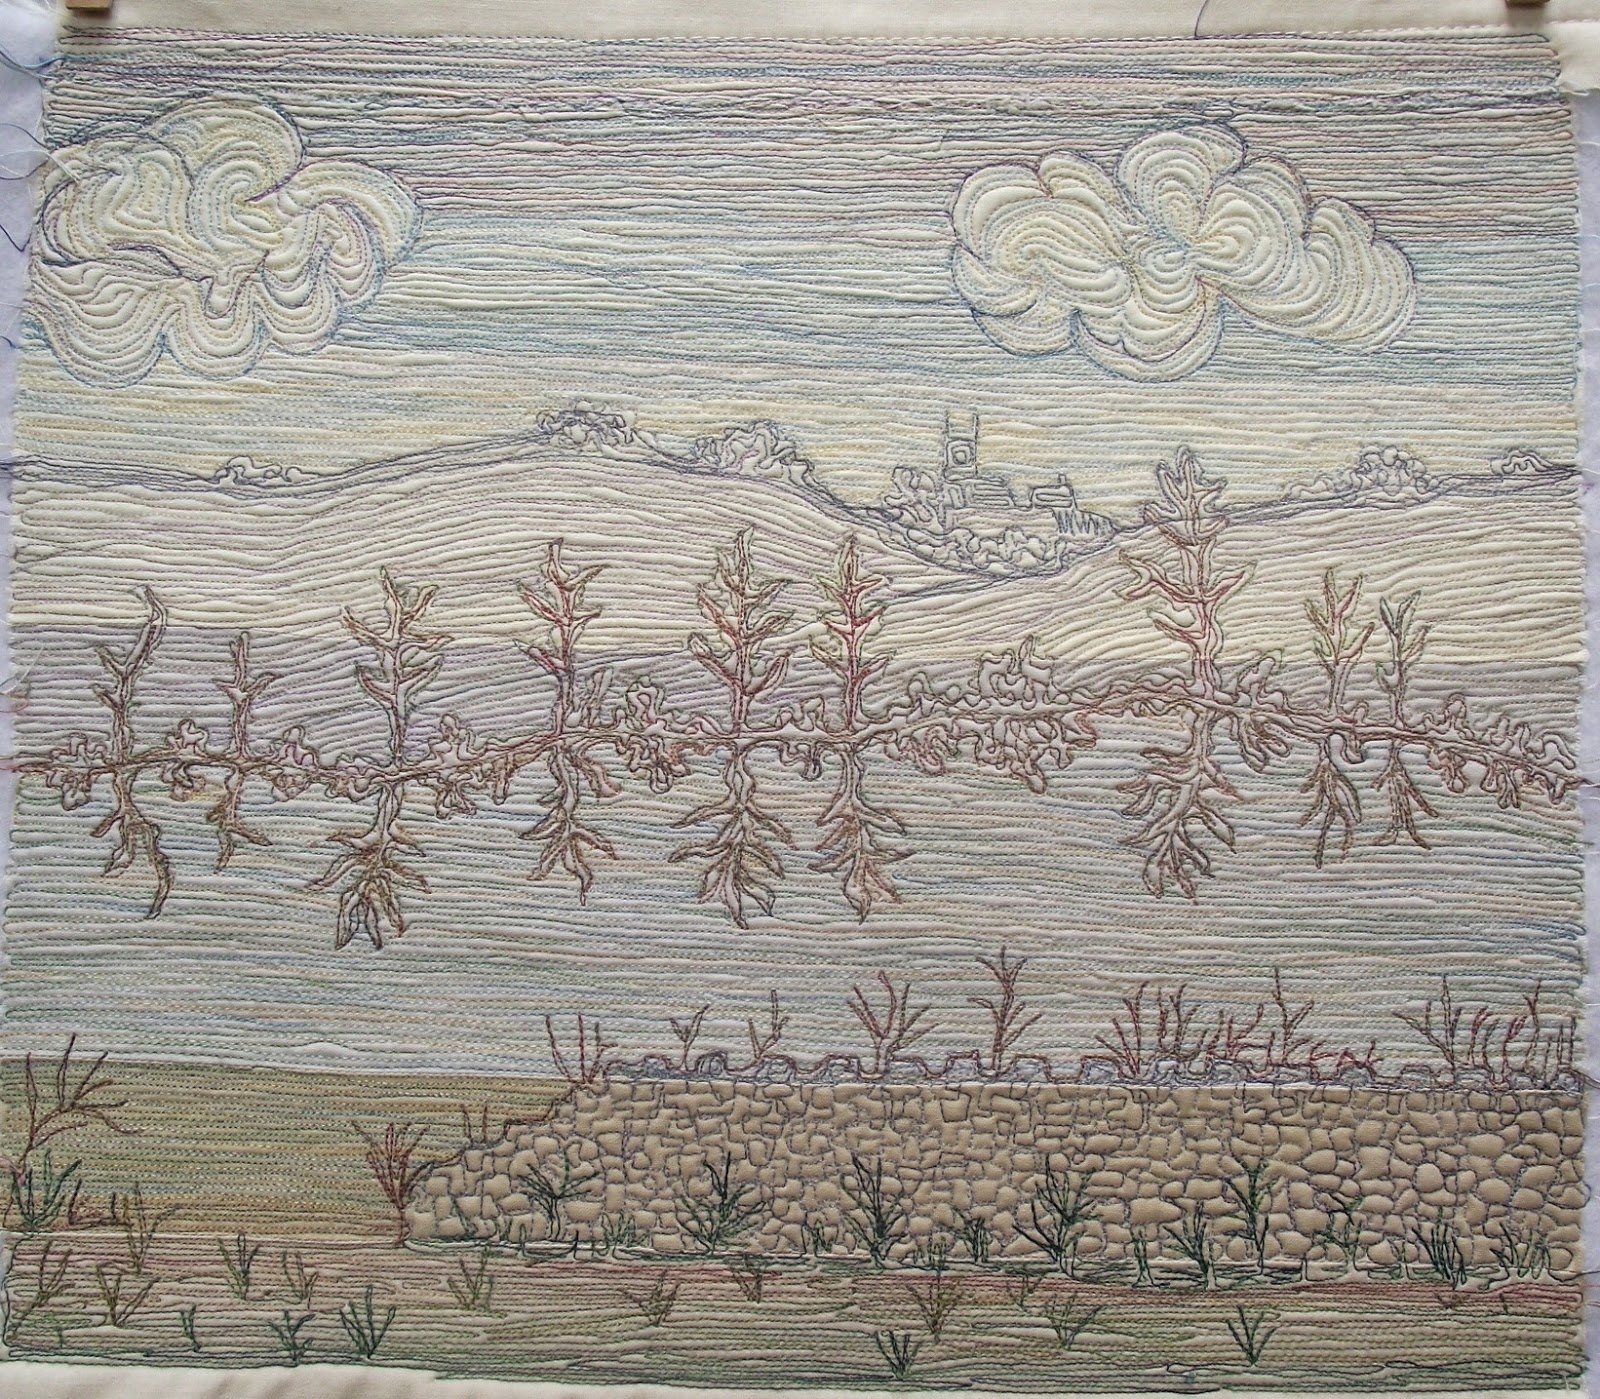
It is a while since I worked on this landscape, after being knocked slightly off course by the wretched frozen shoulder. Today I finally felt like working on it again. I needed to soften the outline of the stone wall in the foreground.
A few weeds in dark green in front of it and some bare twiggy plants in brown on the far side have done the trick. I have now worked out how to finish off the picture - it shouldn't take long.
As for the frozen shoulder - I have now worked my way to the top of the queue and saw an NHS physiotherapist for the first time last week. I went to my doctor about it on the 31st March and had to wait until 12th May to see the physiotherapist. Even though the shoulder is much less painful now and can move a little better, it is far from being normal, and I am looking forward to being monitored and treated by the NHS. It has been a fairly long wait, and I haven't been particularly patient, but at least now I can be fairly sure that things should improve.
Linking up with Connie's blog Freemotion by the River for Linky Tuesday,
and with Kelly's blog My Quilt Infatuation for Needle and Thread Thursday,
and Sarah's blog Confessions of a Fabric Addict for Whoop Whoop Friday,
and Leah Day's blog for Free Motion Friday
I saw this beautiful fresh fluffy white feather being blown across the ground on Tuesday, so I picked it up and brought it home. When I came into the house there were patches of rainbow colours in the kitchen - the windows refract the light. I put the feather on a piece of black cloth in the little patch of rainbow, and tried not to breathe when I pressed the shutter...
Here is the progress so far on Meg's dress - the two front bodice pieces have been joined to the back bodice with felled seams, and I need to draft a pattern piece so I can make a collar. The first step is to fold back the two front edges in the position they will be in when I make the buttonholes and attach the buttons. Then the bodice is laid flat on a piece of paper so I can draw around the neck edge and get an accurate outline.
The two front edges are going to overlap by an inch, and I need to allow a quarter of an inch seam allowance for when I sew the top and bottom collar pieces together. By marking three quarters of an inch from the folded edge I can be sure that I can position the collar an inch from the folded edge.
The drawing of the outline starts at the three quarters of an inch mark, and at the other end will finish the same distance from the opposite folded edge.
Once the outline of the neck is drawn on the paper, it is traced onto the paper that will be used for the pattern piece. I have used ordinary greaseproof paper.
At each end of the neckline I have drawn a short line at a right angle.
The next step is to draw the outer edge of the pattern piece by plotting dots two and a half inches from the neckline and joining them with a gentle curve.
To round off the corners of the collar I used the lens cap from my camera.
To make sure that the pattern piece is symmetrical, I have folded it in half before cutting it out.
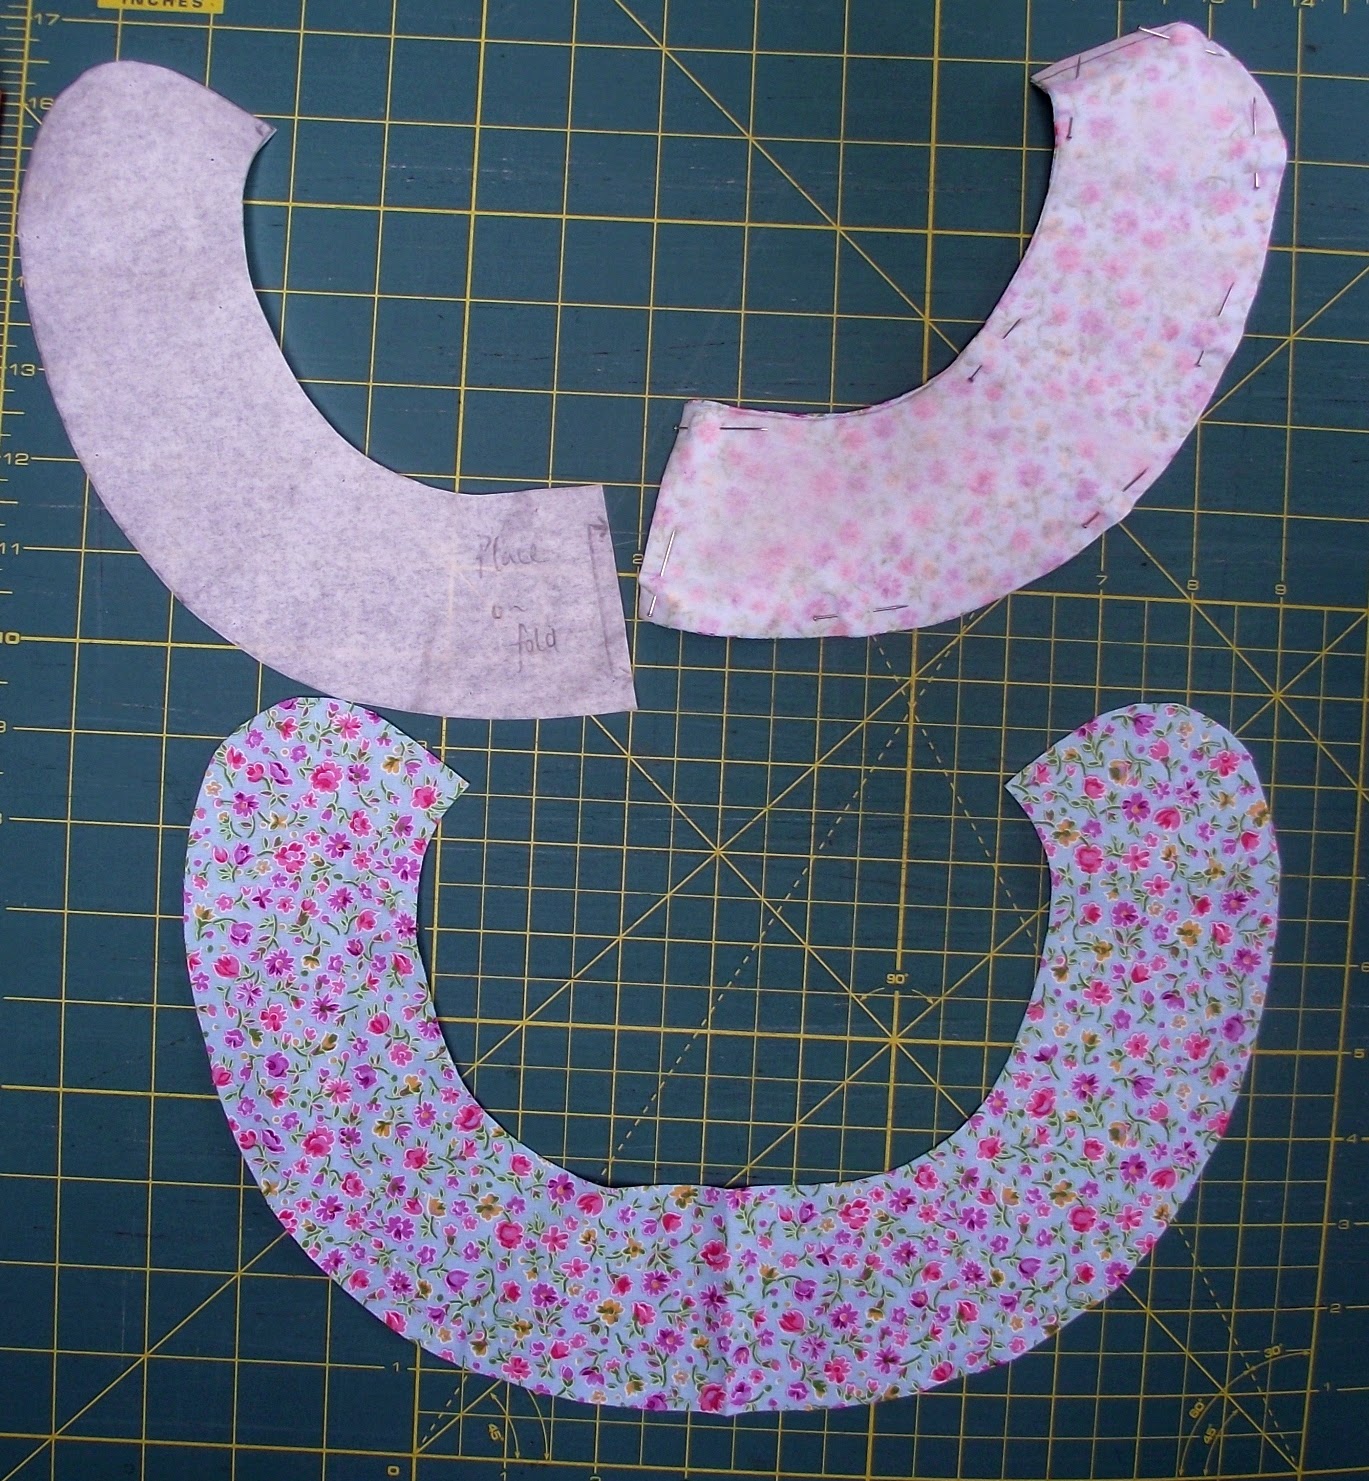
Because I need to cut out two pieces for the collar, I cut the pattern piece in half and then cut out the two collar pieces by laying the centre back line of the collar on the fold of the fabric. Here are the two pieces cut out from the fabric, one already removed from the pattern piece and opened out, and the other still pinned to the pattern piece.
Linking up today with Kelly's blog My Quilt Infatuation for Needle and Thread Thursday.
Last week I started on a rather unusual project... making an outfit using old books for the Out of Print Fashion Show. There is some sewing involved, but mainly my time has been taken up with thinking. Using paper is a whole new adventure for me, and I needed to find out how to make a paper flower. After watching a few videos of origami, I decided that my paper folding skills aren't worth developing, so I eventually came up with this cheerful flower - originally intended to be a rose, but probably more like a camellia. The photograph in the centre of carrots on a market stall in Helsinki gives it a character all its own.
This afternoon I am going to be tackling glue, stuff I generally avoid at all costs. Wish me luck!
Linking up today with Connie's blog Freemotion by the River for Linky Tuesday
A small tortoiseshell and a red admiral, taken last summer in Poland.
Welcome to Angela Brennan, the latest follower - thank you for joining!
For the shoulder seams on Meg's dress I have done felled seams. There are various ways of doing felled seams, working from the front or the back, with or without a prominent ridge from the fold. This is the method that I think works best on a child's garment, where the fold is on the inside.
First, with right sides together, I stitched the seam, and finger-pressed the seam open on the wrong side.
Then I trimmed down one of the seam allowances down by just under half its width.
The trimmed side of the seam is approximately three sixteenths of an inch.
Next I ironed the seam allowances to one side, the wider one covering the narrower one.
Then I turned the work over to work from the right side. The next line of machine stitching went directly alongside the seam line, through all three thicknesses of material. By keeping the seam line aligned with the edge of the left hand side of the foot...
... the stitching came out nice and straight. This is the right side.
Then I turned the work over again, and folded under the raw edge of the wider seam allowance, and ironed it into place.
Now for the third line of machine stitching, worked on the wrong side, along the folded edge.
To keep this line of machining straight, I used the outer edge of the left hand side of the foot as a guide, keeping an even distance between this stitching and the previous line of stitching.
Here is the finished seam, seen from the right side...
... and the wrong side.
Next step in this project will be drafting a pattern piece for a collar.
Linking up today to Kelly's blog My Quilt Infatuation for Needle and Thread Thursday
Not my usual tools and materials at all - a craft knife, paper cutting scissors and a pile of books...
On Easter Monday we called in at our favourite second hand book warehouse, and I was transfixed by a poster near the entrance for the Out Of Print Fashion Show. After a chat with the ladies at the desk, and a fair bit of umming and ahhing, I came away with a pile of books and an idea bubbling in my head. My In-House Model gladly volunteered. After looking terribly grown up and sensible in the 1940s blouse, she is willing to look completely bonkers to humour her old mum.
Fortunately the creation does not have to be made entirely of books. Cloth is allowed. Couture meets origami.
Today I have started ripping into the books. I know what I am going to make, and expect it will evolve along the way. It could be sublime or ridiculous or both.
Taken last summer in Poland - there were lots of them about. I rather like his natty stripy outfit. We don't see these insects here. He is one of these...
On the 30th May my god-daughter Meg will be three, and I have promised her a new dress for her birthday. The plan is to post progress pictures so big sister Lily and their mum Hannah can watch the dress take shape.
First I had to raid my cupboard for a nice cotton print in colours to suit Meg. This one fitted the bill. I'm sure Lily and Hannah will like it, whereas Meg might be rather more interested in the 20 pence.
I am going to use the home-made pattern I made a few weeks ago, but have made a few adjustments so Meg has room to grow. Children often have growth spurts in the summer, and I don't want to make a dress that she will have grown out of by September.
So here is the progress so far. I have cut out the back and front bodice pieces and the sleeves. I can cut out the skirt later - no rush, it will just be rectangular pieces - and I intend to draft a pattern piece for a collar once I have done the shoulder seams.
Welcome to Ilsebyl and Barbara, the latest followers - thank you for joining!
Finished yesterday evening, a rather late Easter present for my husband - here it is in all its woolly glory, and he loves it.
He particularly wanted oak leaves and acorns, so they are on the central panel, and his favourite of all the tweed offcuts was the dark green on the right. I used dark green thread for the oak leaves to match the colour of the green tweed.
The back is fastened with five buttons. I didn't have five buttons the same,
... so I used three plastic buttons in naff 1970s brown...
... and two rather nice old metal buttons.
To get the best view of the free motion quilting you need to turn the whole thing inside out and look at the calico backing, but this cushion is about warmth and comfort, so from now on the backing stays out of sight.
I used three machines for this project - the 1949 Singer 15K hand machine for all the straight sewing, the 1945 15K treadle for the free motion quilting, and the 1936 Singer 201K treadle for the buttonholes.
Linking up today with Leah Day's blog for Free Motion Friday
Sarah's blog Confessions of a Fabric Addict for Whoop Whoop Friday
and Laura's blog Quokka Quilts for TGIFF
Today I got to grips with the tweed cushion that I am making for my husband. I needed to cut the quilted panel to size and bind the edges, and then do five buttonholes. It was a replay of last week when I did the buttonholes on the 1940s blouse - attaching the buttonholer to the 201K treadle and trying not to go crossed eyed at the blur in front of me as the work is swung rapidly side to side beneath the needle.
Here is the back. I used quilting thread and went twice round the buttonhole to get a nice firm finish. If anything I think the buttonholes turned out better on the tweed than they did on the cotton for the blouse.
I always used to do my buttonholes by hand, which was very time consuming. Now with the buttonholer how long does one buttonhole take?
About 30 seconds. Total pleasure.
Linking up today with Kelly's blog My Quilt Infatuation for Needle and Thread Thursday